Cara membuat portofolio
Portofolio sangat penting untuk diperhatikan.
Membuat portofolio adalah cara yang baik untuk mengembangkan kehadiran online Anda.
Portofolio digunakan untuk menunjukkan keahlian dan proyek Anda.
Ini dapat membantu Anda mendapatkan pekerjaan, pertunjukan freelancer, atau magang.
Buat portofolio saya secara gratis »Apa itu portofolio?
Portofolio dapat memiliki tujuan yang sama dengan CV. Kebanyakan CV ditulis dengan teks, sedangkan portofolio untuk pamer, sehingga visual dengan gambar dan seringkali lebih detail daripada CV.
Ini adalah tempat di mana Anda dapat menunjukkan pengalaman kerja Anda dan memamerkan proyek yang paling Anda banggakan.
Portofolio online Anda dapat dibagikan dengan tautannya ke perusahaan, manajer perekrutan, dan perekrut, sehingga mereka dapat memperhatikan Anda.
Ini tentang menunjukkan dan memberi orang lain pemahaman tentang siapa Anda sebagai seorang profesional.
Mengapa membuat portofolio?
Ini adalah cara yang bagus untuk menumbuhkan kehadiran online Anda dan mendapatkan perhatian.
Ini dapat digunakan untuk mendapatkan pekerjaan atau untuk menarik klien ke layanan Anda.
Memilikinya secara online sebagai situs web. Memungkinkan orang di seluruh dunia untuk menemukan Anda.
Desain portofolio akan memberikan kesan kepada pembaca tentang siapa Anda. Pastikan bahwa itu muncul dengan cara yang baik dan rapi!
Untuk siapa portofolio?
Membuat portofolio bisa menjadi penting untuk karir Anda.
Ini dapat membantu saat mencari pekerjaan, pekerjaan lepas, atau menunjukkan keahlian Anda kepada klien baru.
Peran umum yang menggunakan portofolio adalah profesional seperti, namun tidak terbatas pada:
- Pengembang perangkat lunak
- desainer UX
- Desainer grafis
- fotografer
- Profesional pemasaran
- Arsitek
- Penulis
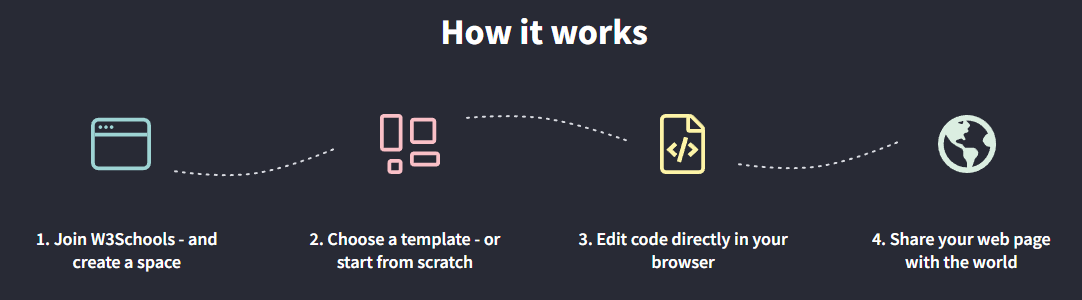
Pernah mendengar tentang W3Schools Spaces ? Di sini Anda dapat membuat portofolio Anda dari awal atau menggunakan template, dan menyimpannya secara gratis.
Mulai gratis* tidak perlu kartu kredit
Apa bagian terpenting dalam portofolio?
Ada banyak cara berbeda untuk membuat portofolio.
Cara membuatnya tergantung pada jenis profesional Anda, untuk siapa Anda membangunnya, dan mengapa Anda membuatnya.
Anda harus menguji, gagal, dan belajar untuk mengetahui jenis portofolio yang tepat untuk Anda!
Ada beberapa bagian yang penting untuk semua jenis portofolio, dirangkum di bawah ini:
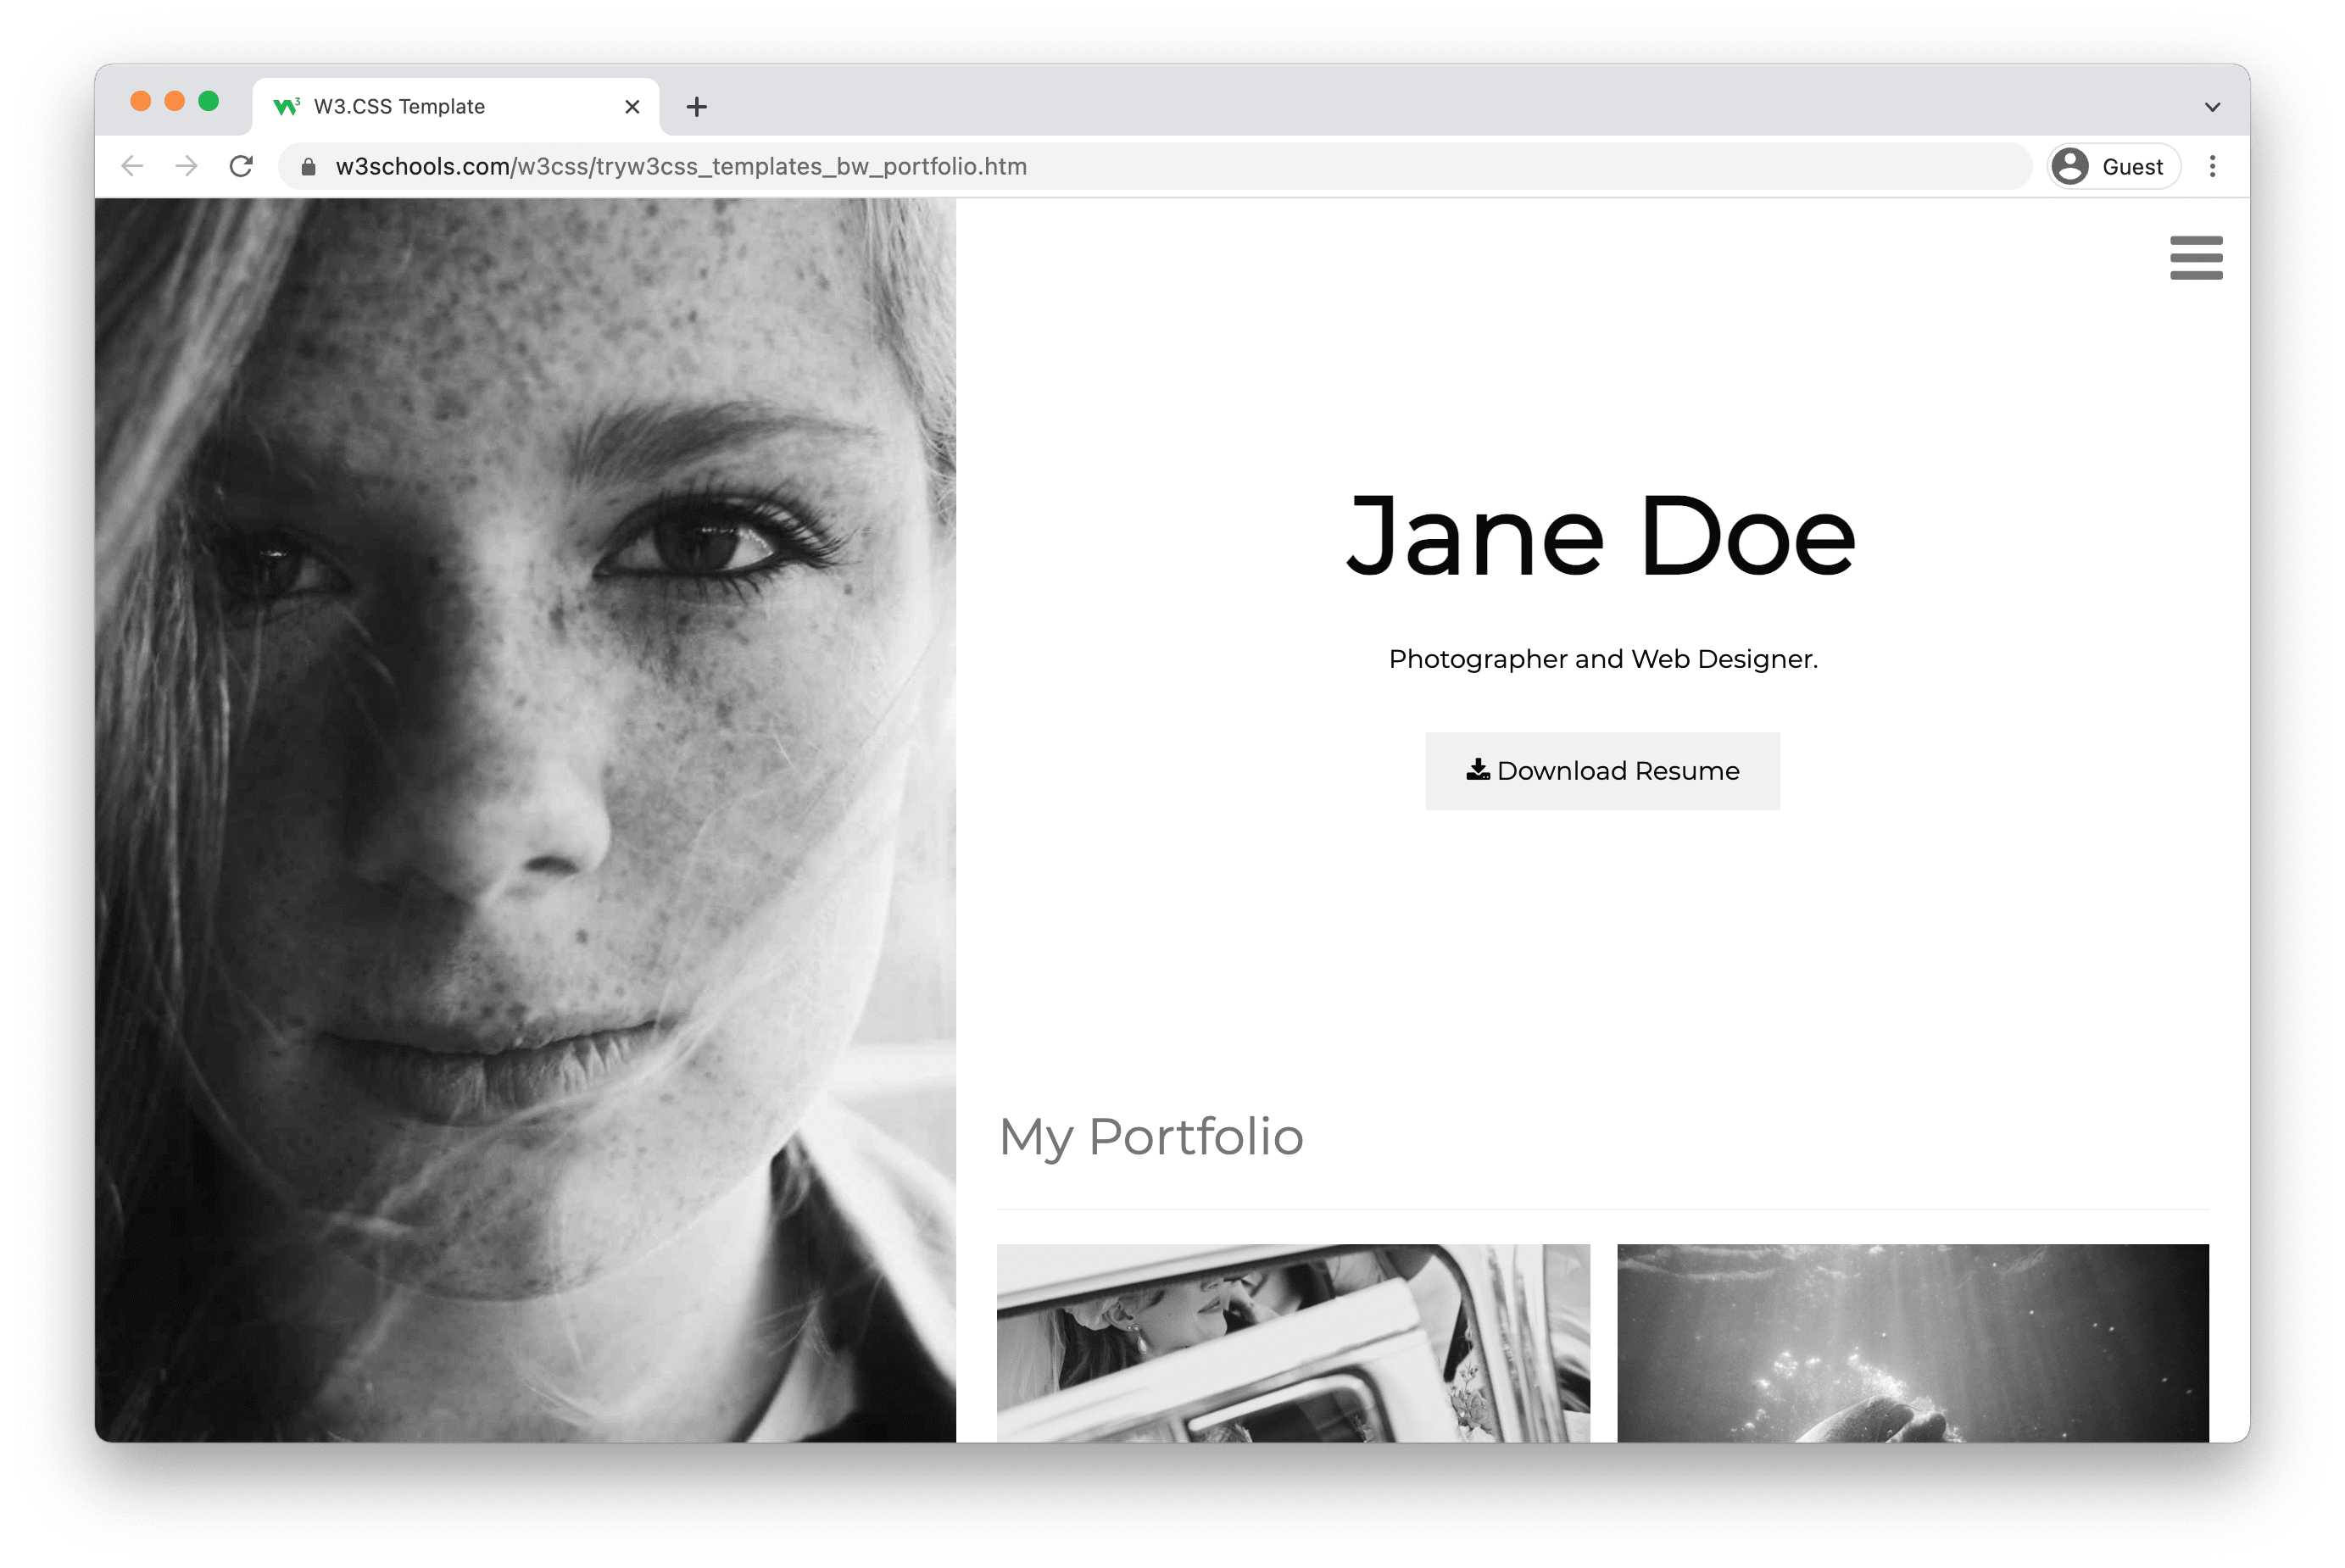
1. Bagian pahlawan.
Bagian pahlawan adalah hal pertama yang dilihat orang ketika mereka memasuki portofolio Anda.
Itu ditampilkan di bawah logo dan menu Anda.
Bagian pahlawan membantu pembaca untuk memahami apa yang Anda tawarkan, mengapa seseorang harus bekerja dengan Anda, dan nilai yang Anda berikan dengan layanan Anda.
Ini sering berisi tombol ajakan bertindak seperti "hubungi saya", "pesan rapat" atau yang serupa.
2. Tentang saya bagian.
Berikan pembaca ringkasan singkat tentang diri Anda.
Sertakan mata pelajaran seperti pendidikan, pengalaman kerja, proyek, dan minat Anda.
Bantu pembaca untuk memahami apa yang Anda sukai dan kekuatan super Anda (hal-hal yang benar-benar Anda kuasai).
Ingatlah untuk membuatnya tetap pendek dan sederhana.
3. Bagian proyek.
Daftar proyek yang telah Anda kerjakan. Cara yang paling sering digunakan adalah mengurutkan daftar berdasarkan tanggal, tetapi dalam beberapa kasus, masuk akal untuk mengurutkannya dengan cara lain yang logis.
Tambahkan detail ke setiap proyek, yang mencakup peran Anda, apa yang Anda lakukan, dan bagaimana proyek tersebut berjalan.
Menambahkan gambar untuk memamerkan apa yang Anda buat adalah nilai tambah! Tunjukkan hal-hal yang Anda banggakan.
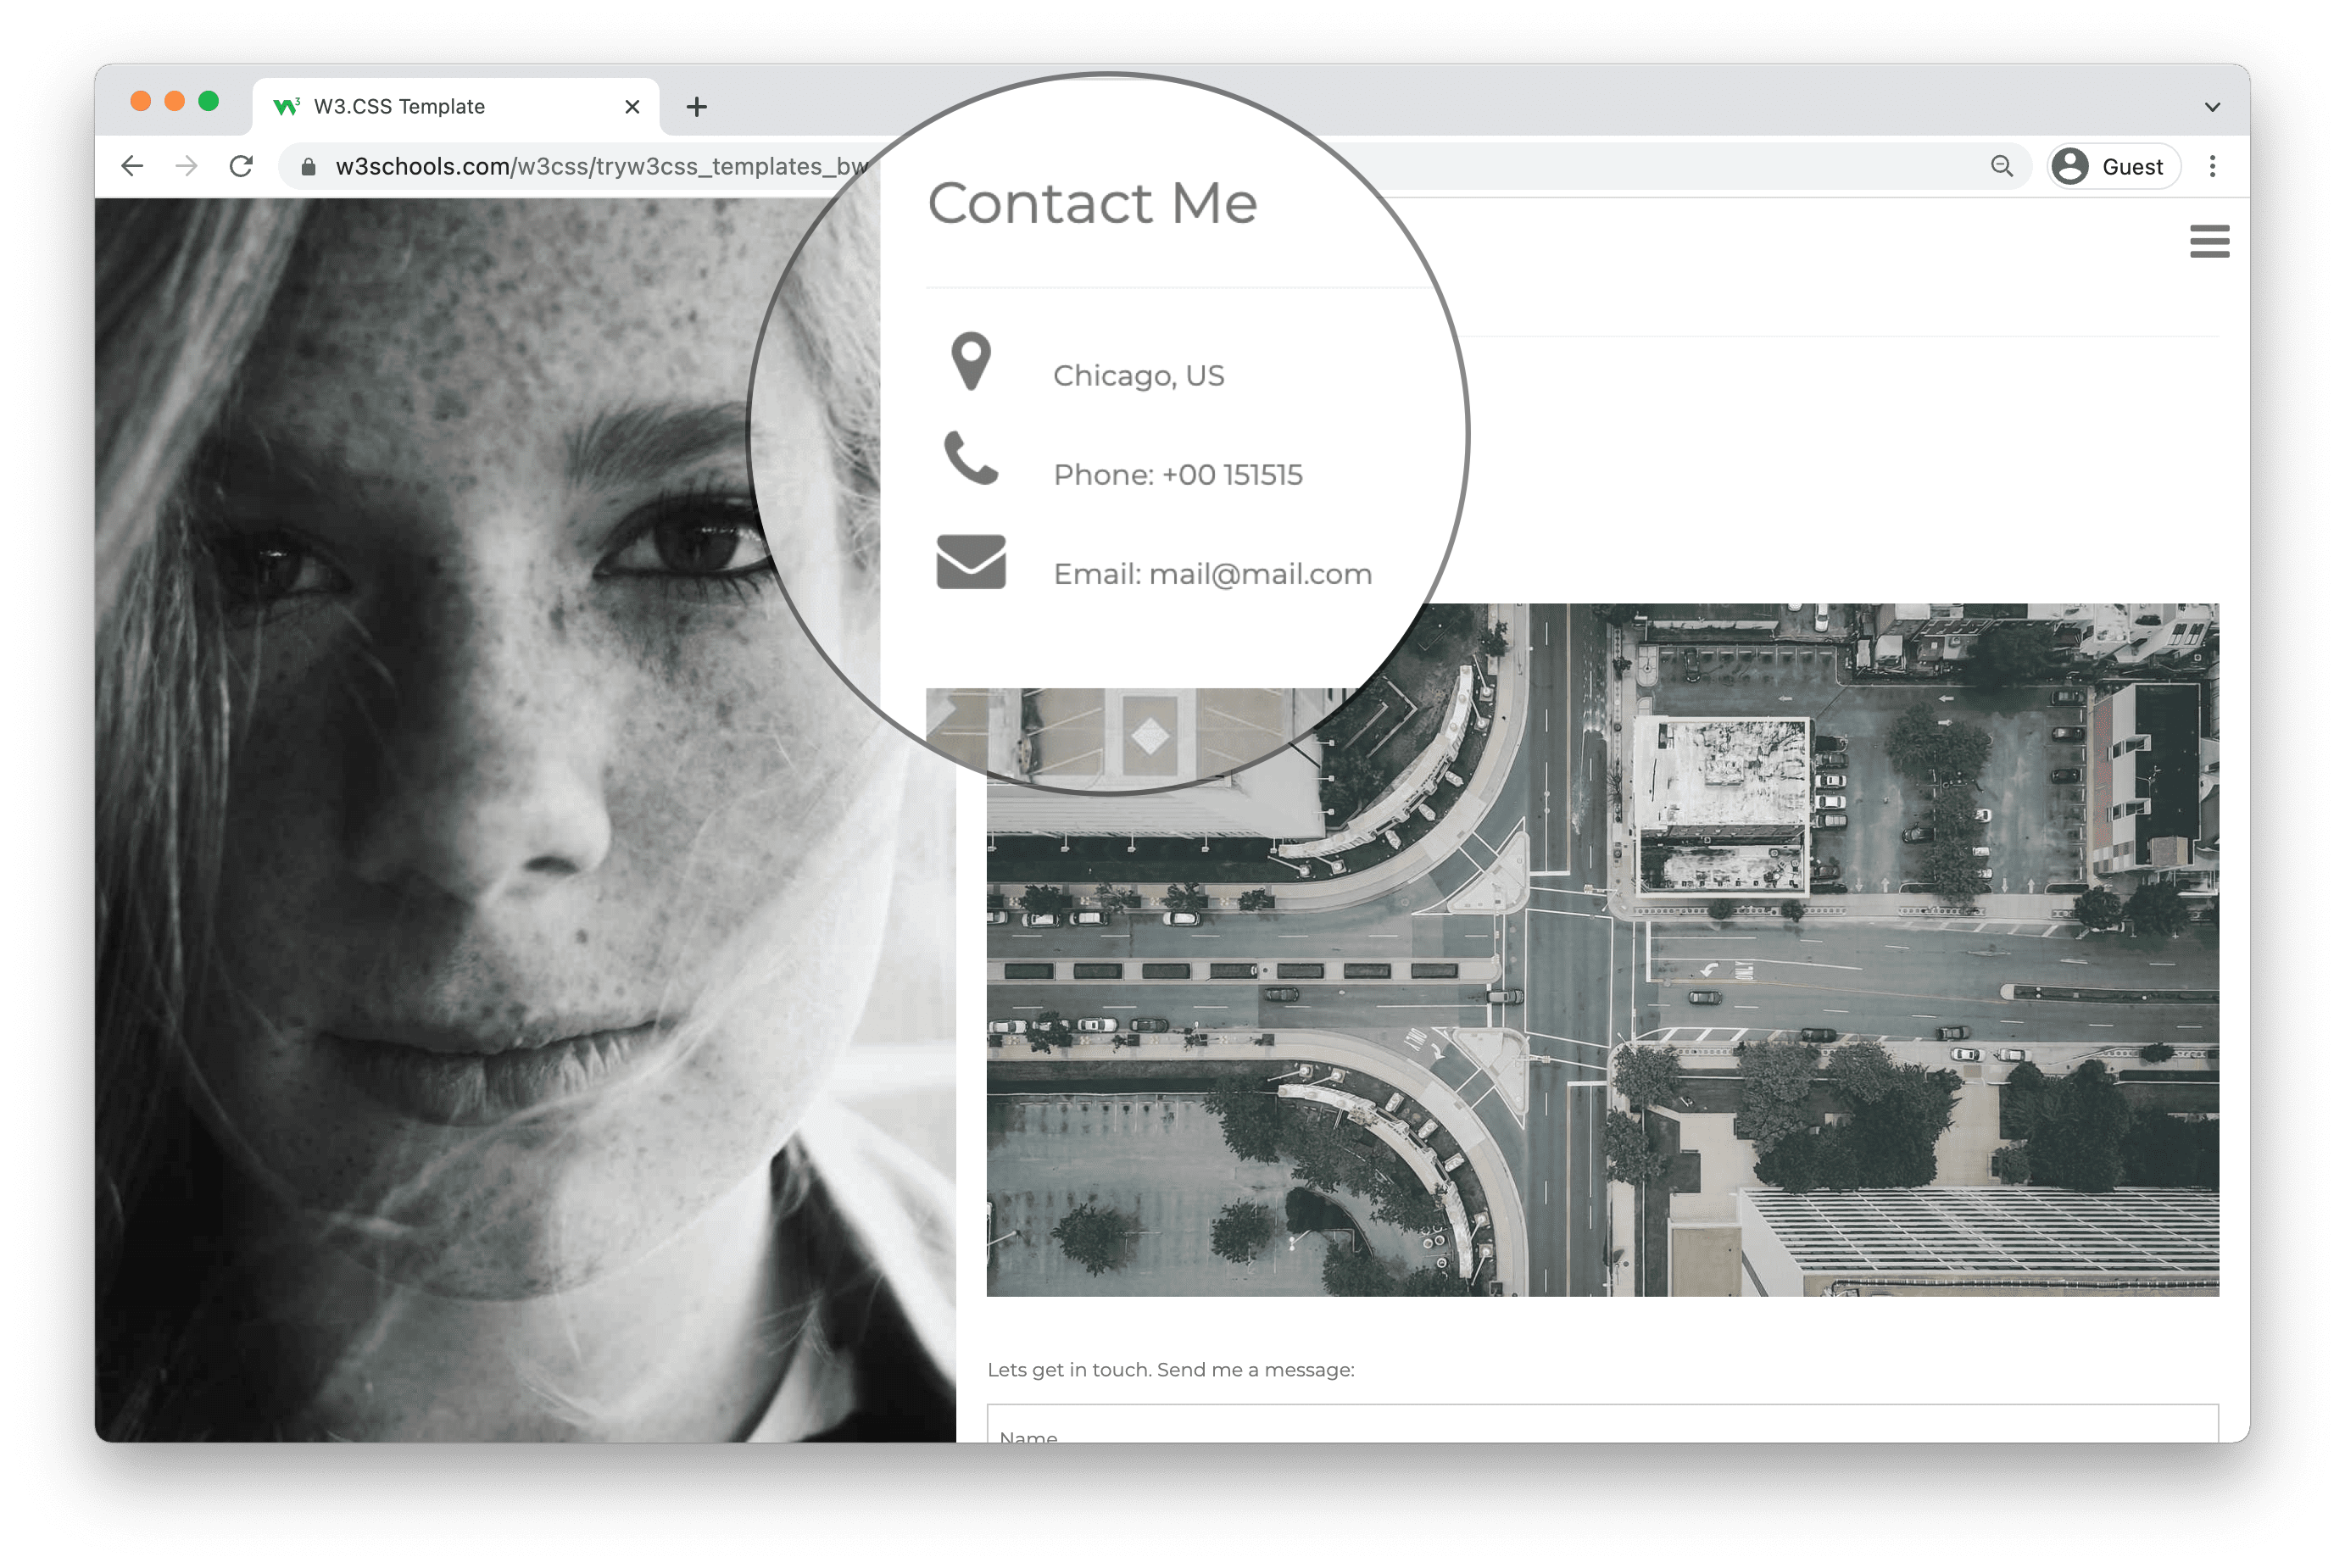
4. Hubungi saya bagian.
Beri tahu pembaca bagaimana dan di mana mereka dapat menghubungi Anda.
Tambahkan detail kontak Anda dan saluran kontak lainnya seperti profil GitHub Anda, LinkedIn, Youtube, dan sebagainya.
Contoh portofolio
Lihat beberapa contoh portofolio.
Anda dapat memuat template portofolio di W3Schools Spaces . Mulailah dengan menerbitkan portofolio Anda dalam beberapa klik.
Publikasikan portofolio saya secara gratis* tidak perlu kartu kredit
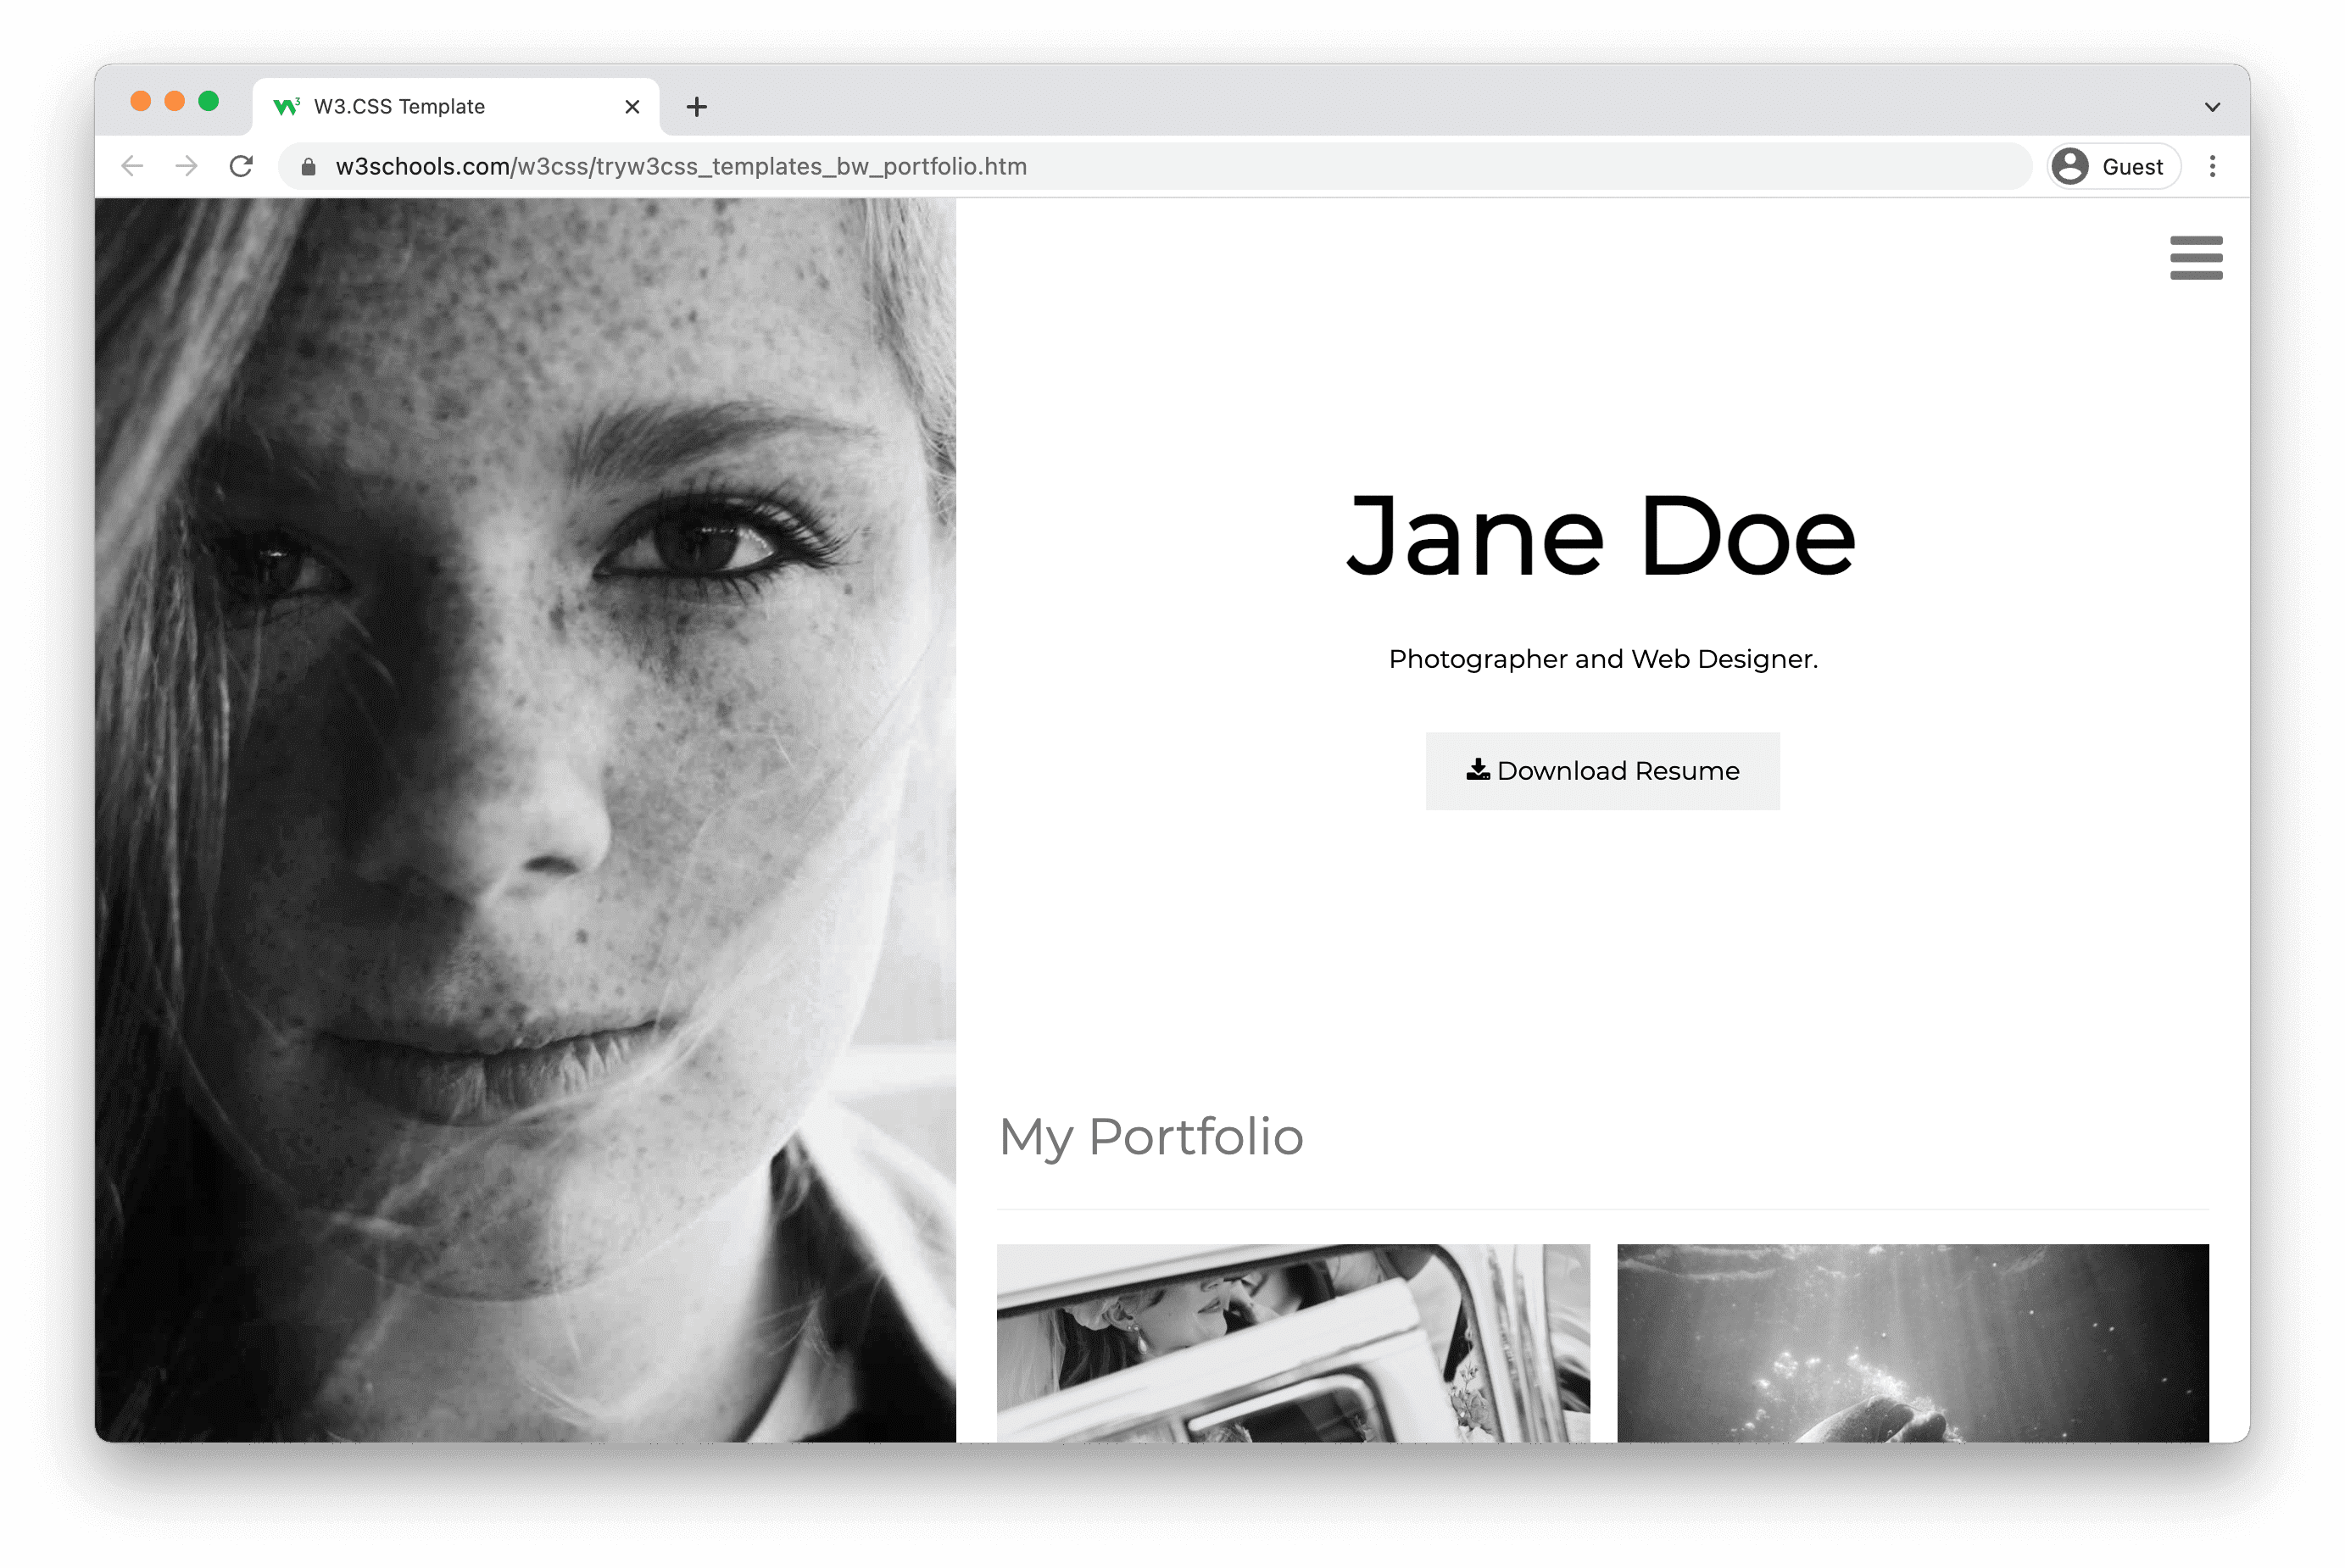
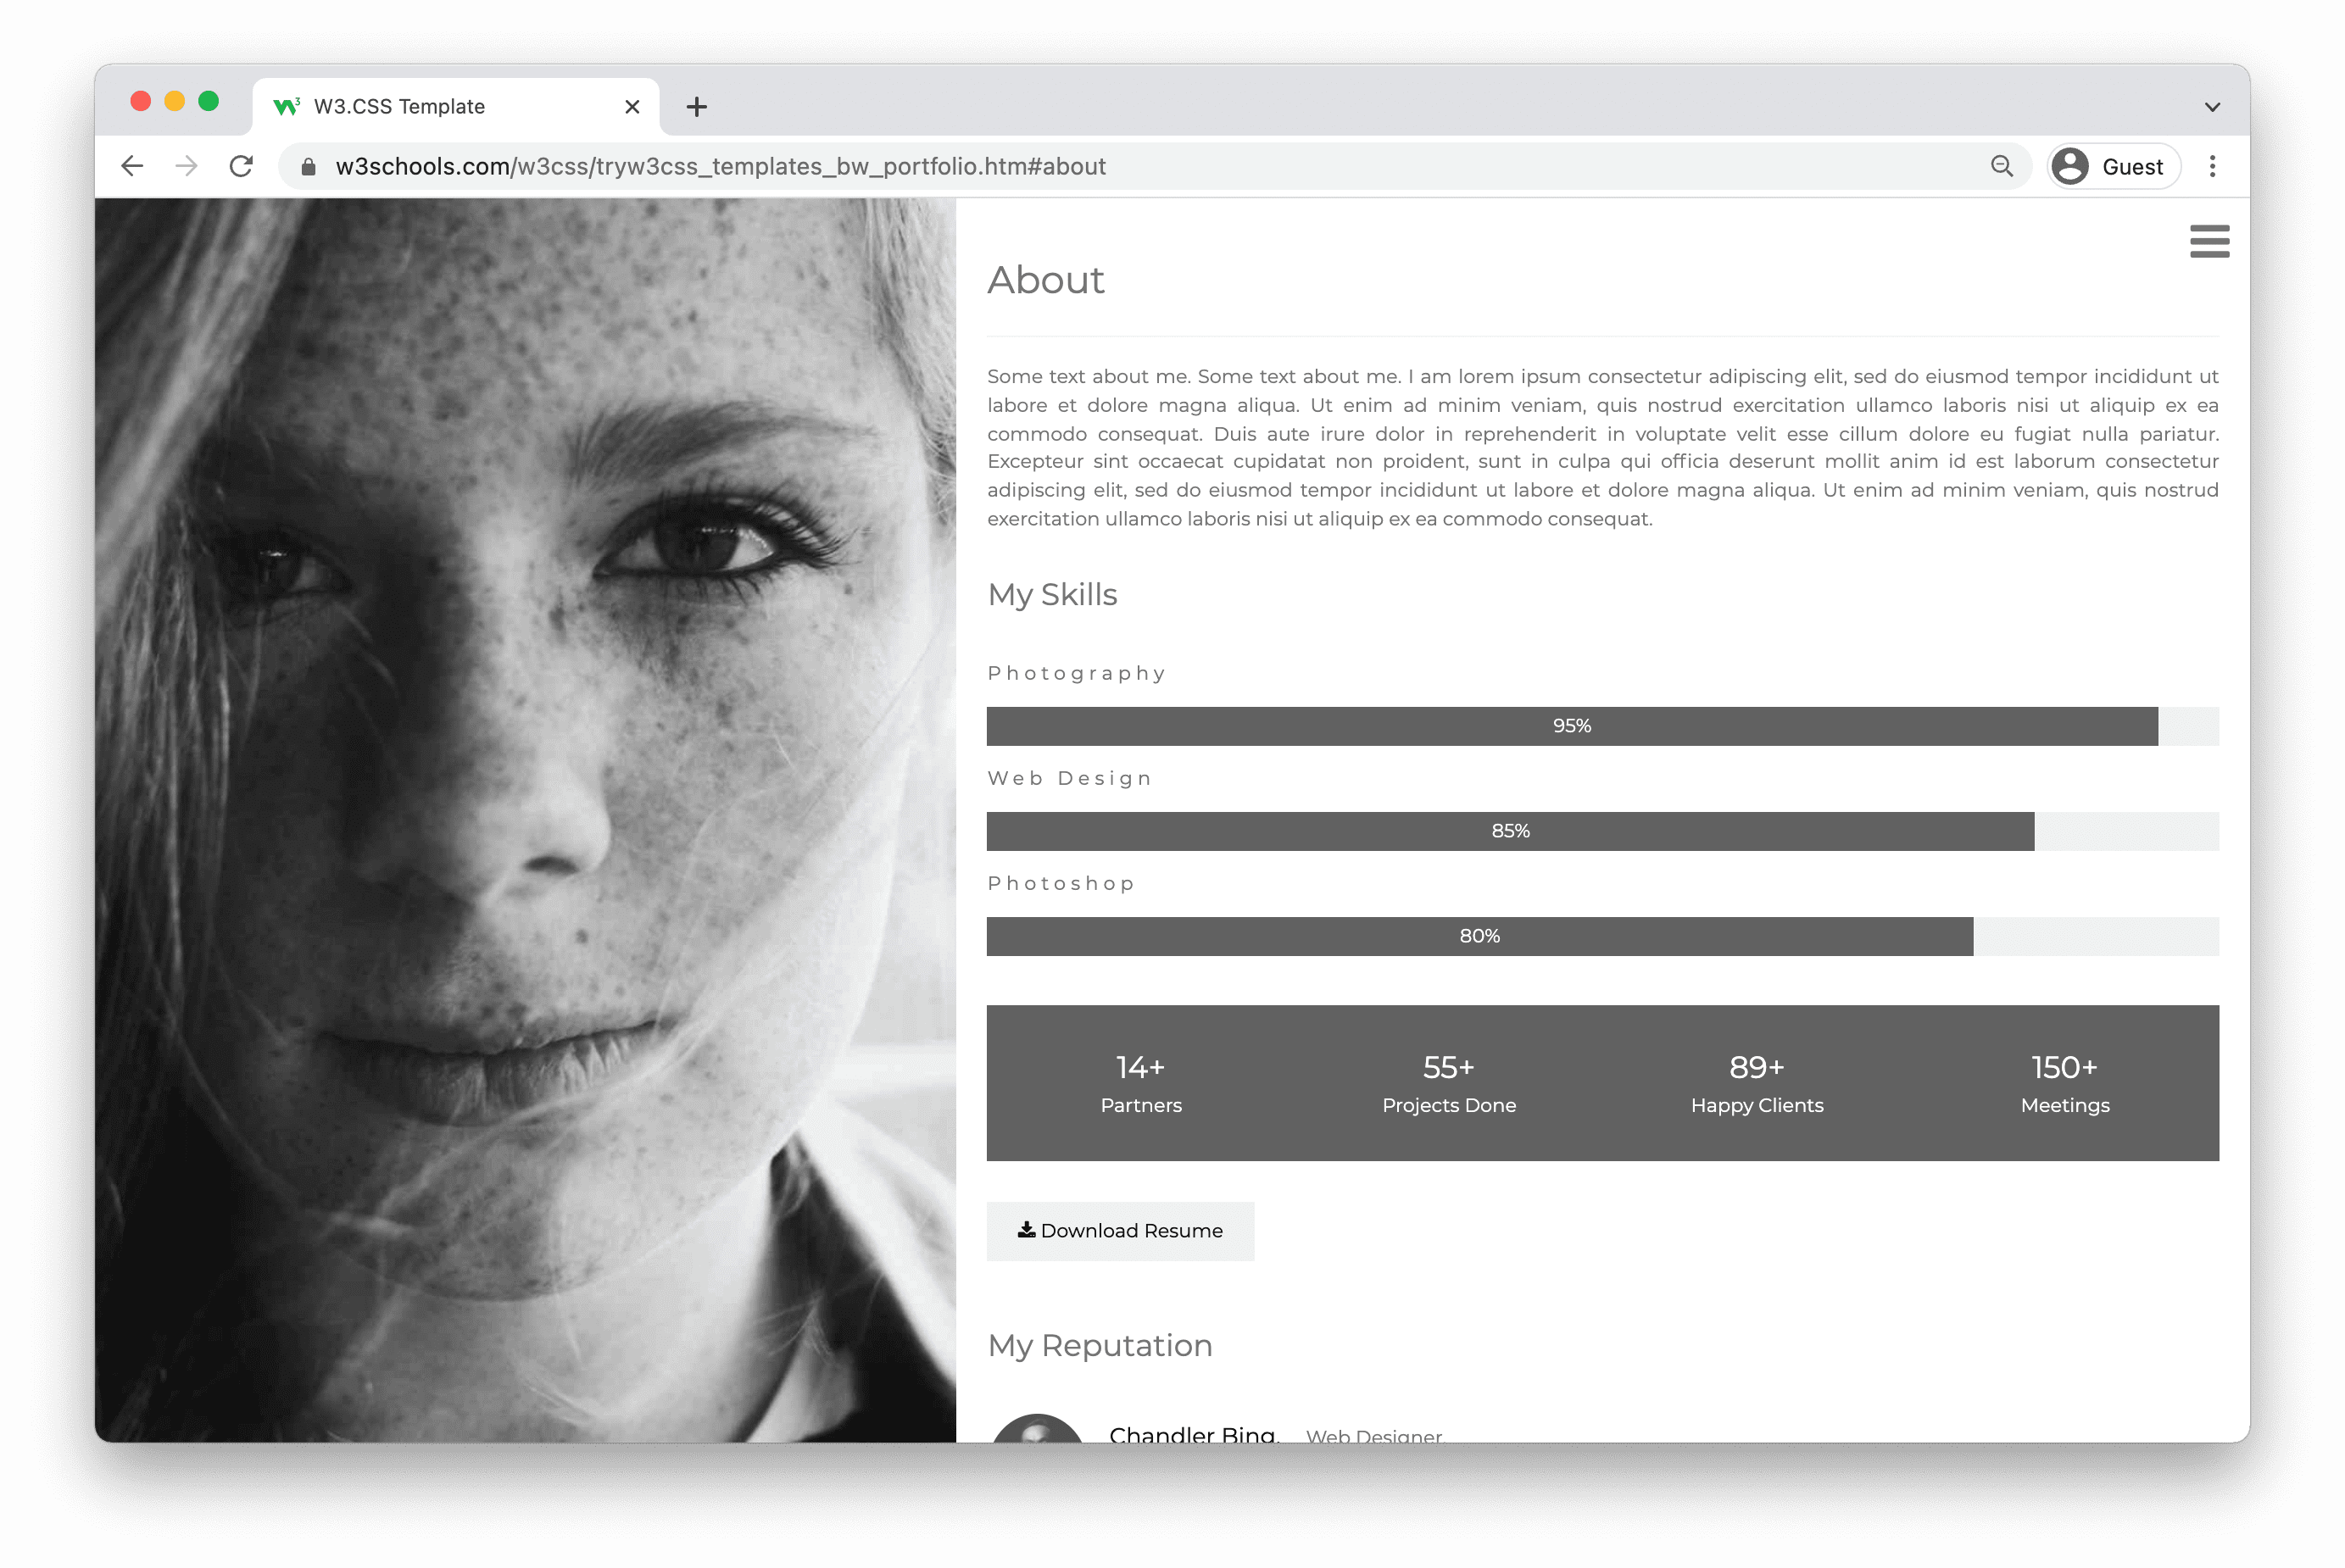
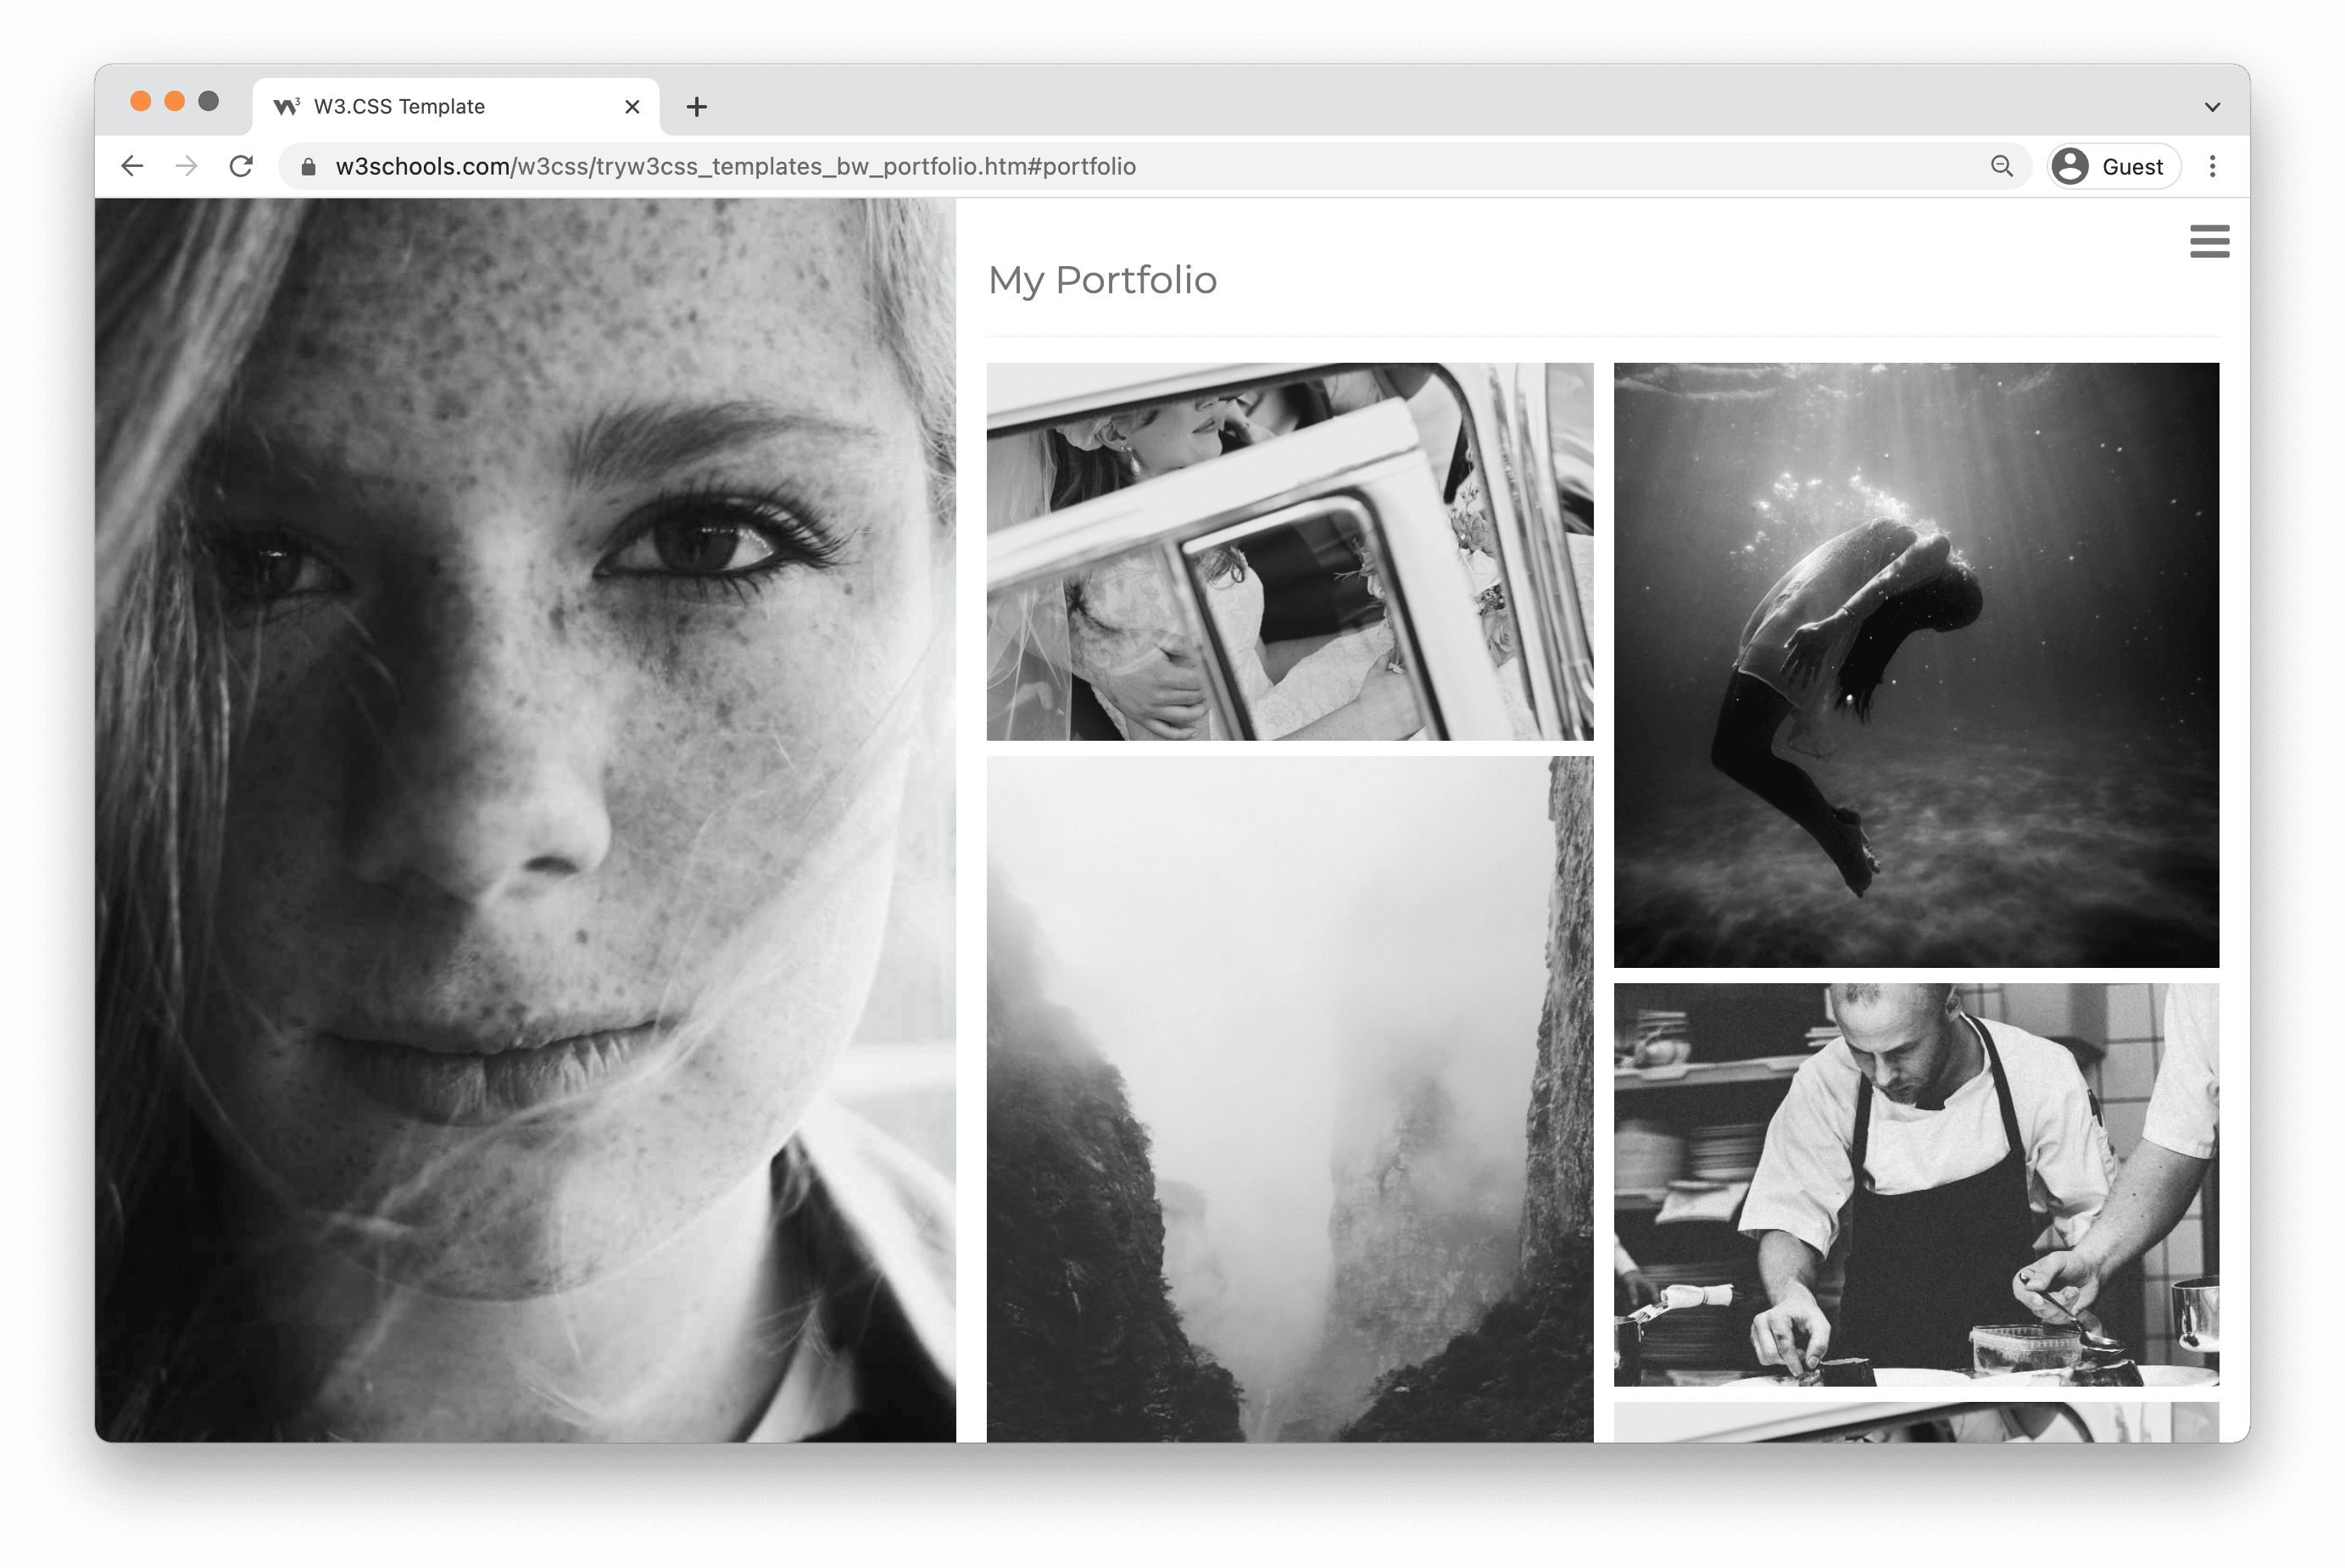
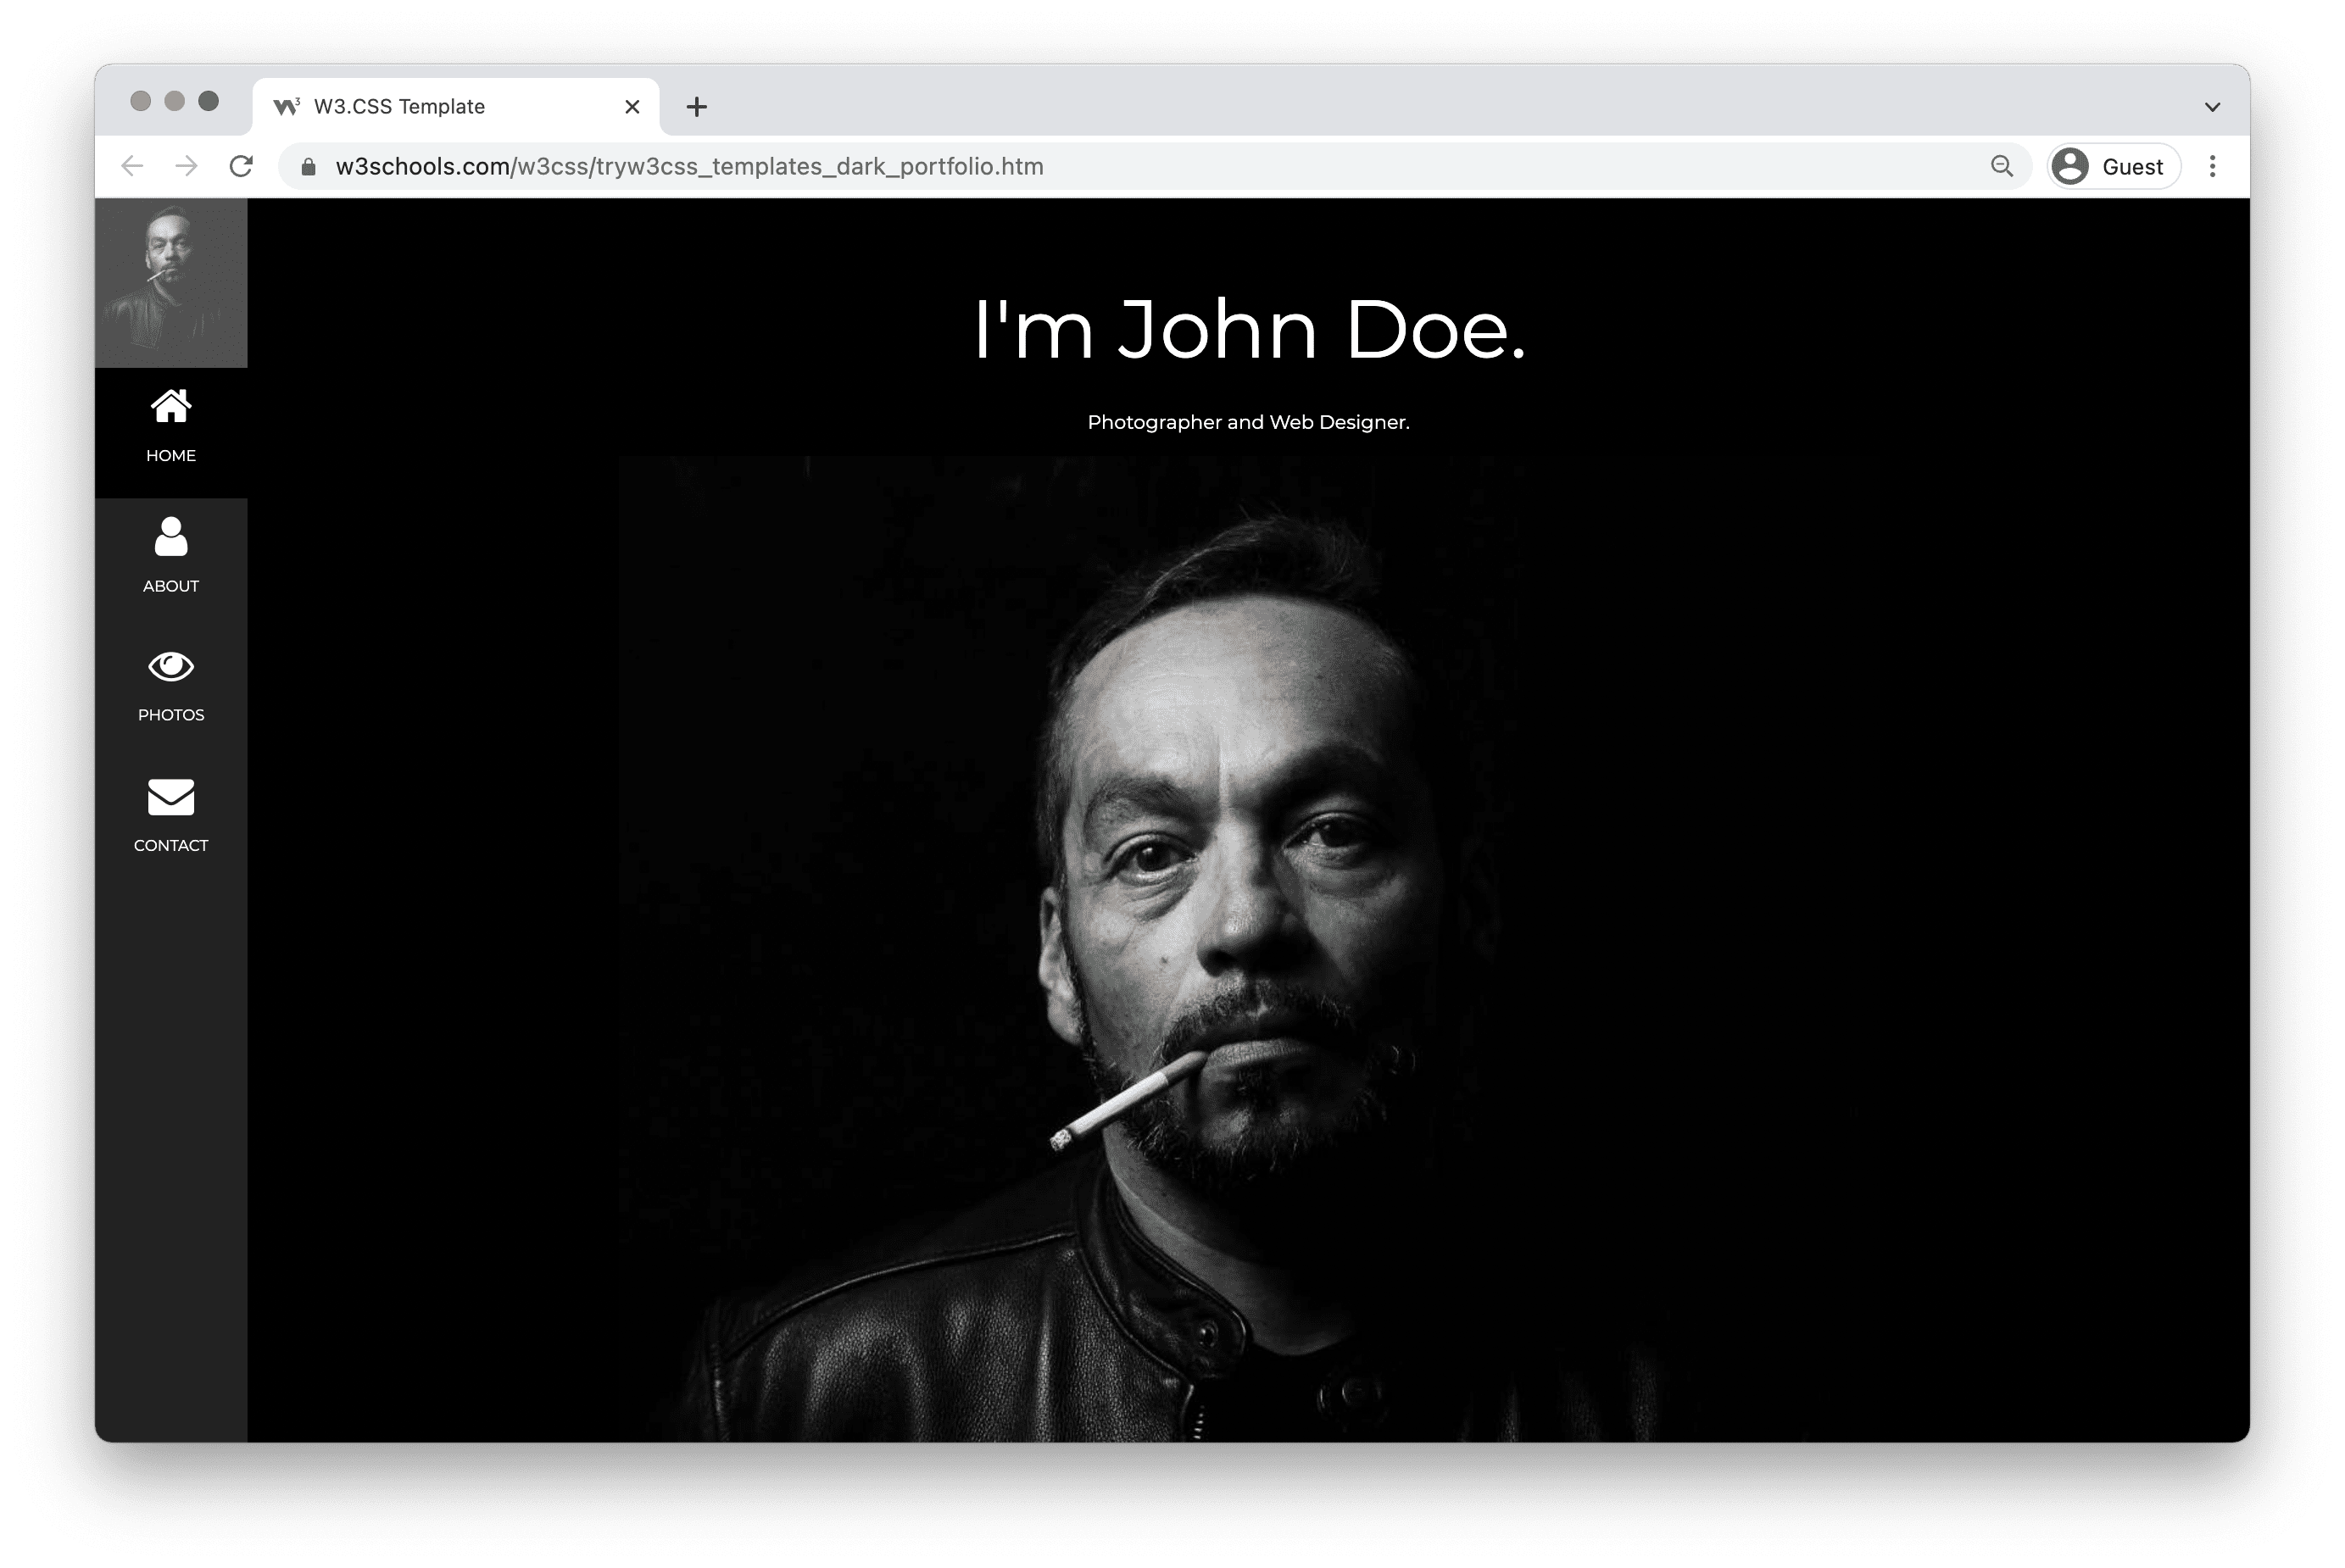
Template Portofolio Hitam & Putih
Dark Portfolio Template
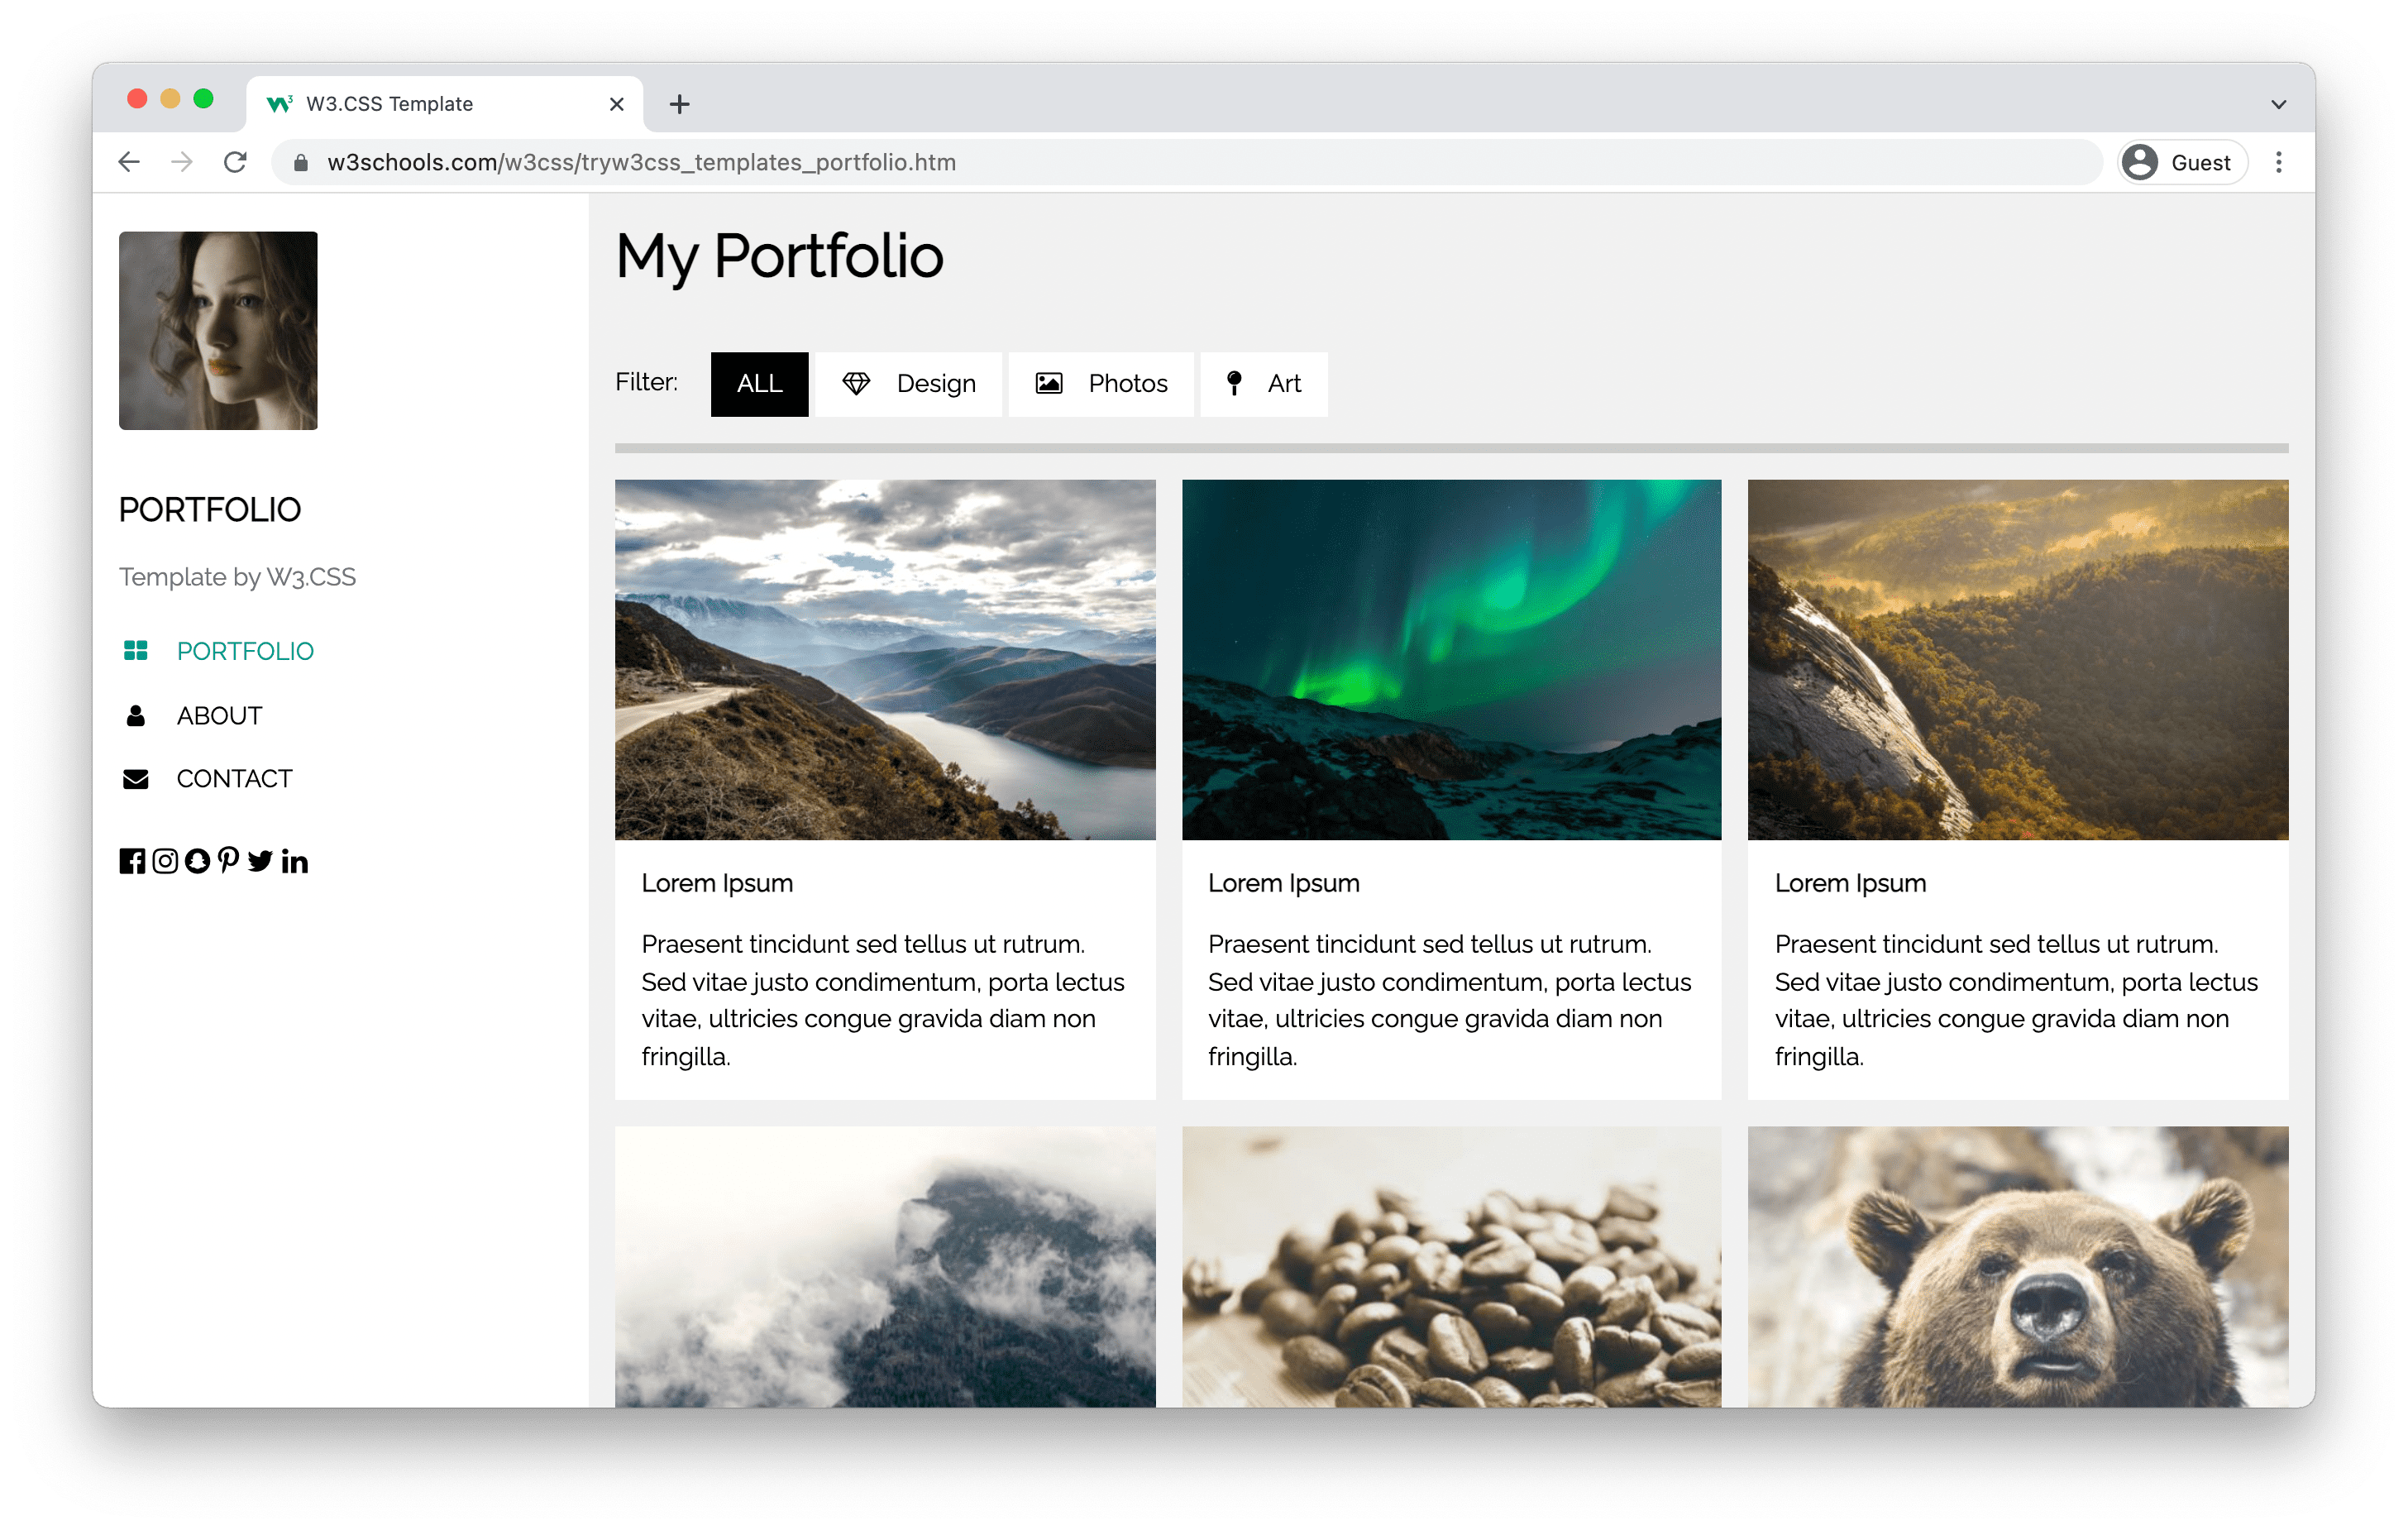
People Portfolio

My Portfolio Template
What do I need to know to create my own portfolio?
HTML, CSS and JavaScript are the foundational languages to create a website.
You can come a long way just using these three!
- Create the structure with HTML. The first thing you have to learn, is HTML, which is the standard markup language for creating web pages. Learn HTML ❯
- Style with CSS. The next step is to learn CSS, to set the layout of your web page with beautiful colors, fonts, and much more. Learn CSS ❯
- Make it interactive with JavaScript. After studying HTML and CSS, you should learn JavaScript to create dynamic and interactive web pages for your users. Learn JavaScript ❯
How to create a portfolio step-by-step
Follow the steps to create your portfolio from the ground up.
Preparations
Decide which code editor to use and set up your environment.
W3Schools has created an easy to use code editor called W3Schools Spaces. Sign up and get started in a few clicks.
Start for free ❯Create your index.html file. So that you are ready to enter the code.
All set up. Lets go!
Step One: Add HTML Skeleton
Type an HTML skeleton code, which is the starting point for your website. It is the structure which holds the code and ensures that it is properly displayed on the internet.
Read here for how to create a basic HTML Skeleton: How to create a HTML Skeleton
Step Two: Add Navigation Bar
The navigation bar is a short representation of the content on the website.
It is one of the first things that a visitor will see.
It helps the visitors to find and navigate through the content on website. It is important to create well-structured navigation. So that your visitors can find what they are looking for.
Here is an example of how to create a top navigation bar: How to create a Top Navigation Bar
Step Three: Add Hero section
The Hero section, together with the navigation bar, is the first section of your portfolio that people will see.
It should contain short information about several things such as:
- Who are you?
- What do you offer?
- What is your profession?
- Why should people work with you?
- Which actions should you take?
Write in first-person and keep it short and simple.
Additional things preferred in the hero section are:
- Eye-catching graphics, either as a background or side-by-side with the text.
- An action button that leads to content on your portfolio or to the content of another website.
Here is an example on how to create a Hero section: How to create a Hero image
Step Four: Add About Me section
In this section, you can get creative. This can help you to to stand out.
Here you can personalize the content and write about yourself more in-depth.
The content you can include in this section is:
- Your introduction
- Who are you as a professional
- Your education
- Your skills
- Your work experience (present and/or past)
- Your hobbies
- Your goals and ambitions
In a way, you can consider the "About me" section as a short summary of your CV.
Feel free to write about yourself in first person.
Personalization and making people understand you as a person might bring you more attention.
Here is an example on how to create an about me section: How to create an About Me section
Step Five: Add Work Experience section
The work experience section highlights the experience, knowledge, and competence that you have made along your way.
Here you can add:
- Links to your projects with the project name and/or short description of what the project is about.
- Links to blog posts that you have written with title and/or short description about what it is about.
- Your professional awards or achievements.
- Highlighting your work and your accomplishments is a way to create opportunities for yourself.
- Visual representations such as images or graphics.
Step Six: Add Contact section
The contact section is the section that lets your visitor get in touch with you.
You should always include a way for visitors to contact you, either through a contact form or by writing down your contact information such as:
- Address
- Phone number
- E.g. Github profile, LinkedIn profile, Youtube profile and so on.
Here is an example on how to create a basic contact section: How to create a Contact section
Step Seven: Add Footer section
The footer can be experienced as a minor section, but it is an important one of every website.
It is about showing critical information based on your website goals and the needs of your visitors.
Often it contains technical information about copyright, but it can hold other information, such as:
- Link to "Privacy policy" page
- Link to "Terms of use" page
- Contact information
- Website navigation links
- Links to social networks
- Link to your shop
Here is an example on how to build a footer section: How to create a Footer section